


Do you know how you can make your X / Twitter account private?
Knowing how to make your account private in X is one of the most used and important actions to take control of when you’re looking forward to being under the radar.
In an age where online privacy is more critical than ever, controlling who can see your social media content is essential. If you’re looking to enhance your privacy and restrict access to your posts, learning how to make your account private in X is a crucial step.
We understand the importance of safeguarding your personal information, and that’s why we made this comprehensive guide and walk you through the process of setting your X account to private, providing clear step-by-step instructions and helpful tips.
Make sure to follow the yellow-marked aspects
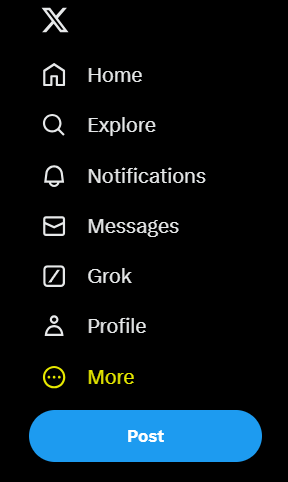
Step 1: Just click on the bottom where it says “more”.
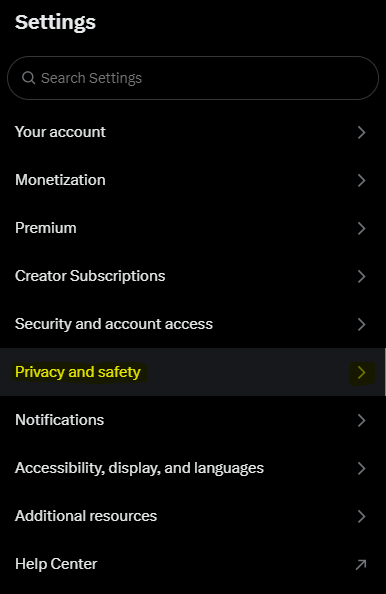
Step 2: Go to “privacy and safety” at the bottom.

Step 3: Choose “privacy and safety” marked in yellow.
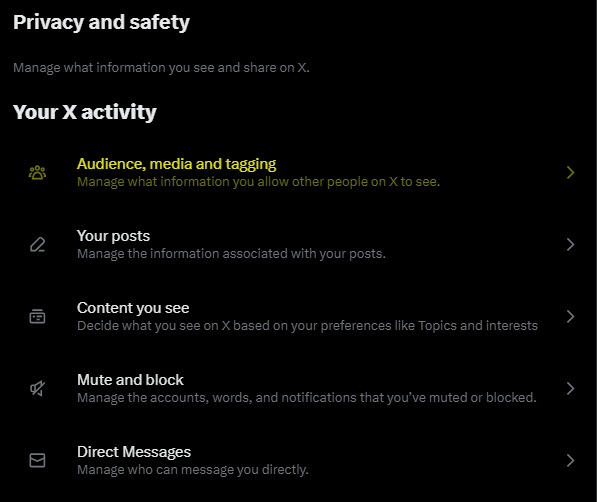
Step 4: The “audience, media and tagging” option is what you’re looking for.
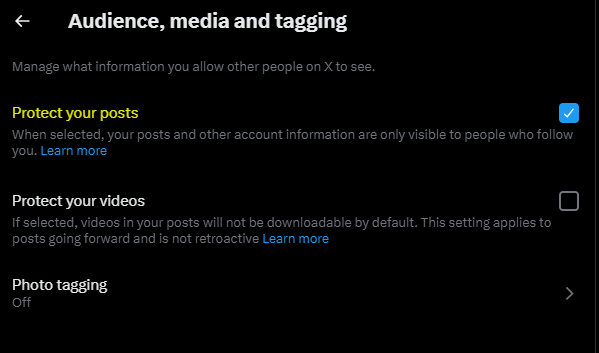
Step 5: Go to the first option named “protect your posts” and mark that one.
Step 6: Make sure your account is private when you see a padlock logo next to your name.

You’ve now learned how to make your account private in X, taking a significant step towards protecting your online privacy and controlling who can view your content.
By following the steps outlined in this guide, you’ve ensured that your posts and personal information remain secure and visible only to those you choose 🔒